What is Selenium
How does this magical package work? Selenium is a package used for automation testing purposes, and was primarily built for unit-testing web applications. However, it is also used for Webscraping purposes, especially for dynamically-loaded websites (which I will discuss later).
Simply put, Selenium is a package that allows us to imitate a real human interacting with a website. Whether it be clicking buttons, searching for things or logging into accounts, Selenium can help us do just about anything a human can! Our Python script will be a bot that works automatically, while acting like a real person visiting the website the whole time!

Selenium helps our scripts act as spies! Our automated bots act as real humans surfing the web!
This is extremely useful because with this power, dynamically loaded websites will naturally load the data that we want to access! With the data loaded, we can then begin our Webscraping process.
Dynamically Loaded Websites
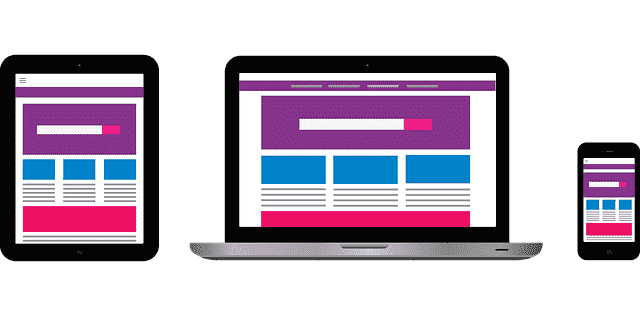
I’ve been using this term “Dynamically Loaded Website” pretty often so far, but what exactly does it mean? A Dynamic website is a website that loads differently every time you or another user visits the page. It is in contrast to a Static website, which I’m pretty sure you can guess, loads the same every time someone visits it. Simply put, a Dynamic website is one that is constantly updating and changing, thus it is “Dynamic”!
A really great example is Facebook. If you were to visit your Facebook page, you will probably see posts on your feed, some sidebar information and a navigation bar. Now if your friend were to visit Facebook, will the page load the exact same webpage? I highly doubt it. This is because facebook is dynamically loaded. It understands who is loading the website, and feeds data from a server to load a website that is specific to your account! This is clearly a dynamic website!
Everyon'es Facebook feed is different!
In contrast, a website like ours is considered Static! This is because if you and your friend were to visit this blog, it loads the same content for both your computers! The content and website is constant, making it very much a static website!
Installation
Now let’s get to the nitty-gritty. Just like the BeautifulSoup article, I’ll begin with the installation process for Selenium. Now that you have pip installed, simply input the following line to download the Selenium package:
pip install selenium
Another thing we need for Selenium to function is a web driver. Our script is going to act like a human surfing the web, thus we also need a browser for our bot to surf! In this article, I’ll be using the chromedriver because I believe it has many great chrome options that are simple to implement and are also extremely useful when it comes to Webscraping, but using other drivers also have many benefits too!
To download the chromedriver, simply visit the chromedriver installation webpage. Now before you choose a random download location, please take note of where you download this chromedriver executable. We will need it later in the code, so it’s a good idea to keep track of where your chromedriver is located!
With that, you’re pretty much done with the Selenium Installation setup!
Basics of Selenium
Before we get into the project, let’s go through some basic syntax and understand how using the Selenium Python package will really work. As I’ve said before, Selenium is actually primarily used for unit-testing, which is simply running automated tests on portions of web applications to make sure they work as intended. The entire unit-testing portion of Selenium is pretty complicated, but lucky for us Webscraping with Selenium is pretty streamlined. It all has to do with the Web Driver!

Our driver is very much the core of our automation process!
A Web Driver is the most important object when it comes to using Selenium. To oversimplify things, think of it like a browser! Through the Driver object, we can interact with web pages on the internet! Using the Web Driver object, we can also find elements from Webpages just like how we did with BeautifulSoup, with CSS selectors!
With the Web Driver, it is actually slightly easier to use our CSS selectors! The Web Driver object actually has methods that specify elements based on tag names, class names and IDs, thus not needing us to use the special symbols used in CSS selectors! It also does have methods that allow you to use CSS selectors, so don’t be afraid if you need an element that is very specific!
The Web Driver object also has many methods that allow us to interact with the page. From clicking buttons to scrolling, filling up search fields or hovering, the Web Driver object acts just like a human (but of course we will be instructing it with code). This makes Selenium an extremely useful package, regardless of if you are using it to Webscrape or not!
Enough talking, let’s get to actual coding shall we?
Hockey Stats Scraper
For today’s project, we will be building a script that scrapes data off a Hockey Statistics webpage, consolidating data of our favourite team! The website we will be scraping from is another Webscraping sandbox website that was built to encourage users to practice Webscraping. Like I said in my previous BeautifulSoup article, not all websites allow Webscraping so please do your research before building your scripts!
Our Webscraper should search the statistics of our favourite Hockey team (for today’s purposes, the ‘Boston Bruins’) and scrape all winning seasons of the Boston Bruins!
First things first let’s import our packages! For Selenium projects, there are quite a few things to import so copy and paste the code if necessary!
    from selenium import webdriver
    from selenium.webdriver.common.by import By
    from selenium.webdriver.support.ui import WebDriverWait
    from selenium.webdriver.support import expected_conditions as EC
These imports look scary, so let’s go through them briefly.
The first line, importing ‘webdriver’, simply allows us to use the webdriver object! As I’ve discussed in the previous section, the webdriver object is the core object of all our selenium scripts so it is vital that we import it to use later on!
The next 3 lines involve importing ‘By’, ‘WebDriverWait’ and ‘expected_conditions’. Basically, we will use these 3 elements together to ensure our webpage is loaded properly before scraping! This is important because sometimes, our script moves too fast and before any HTML element on the webpage is loaded, I’ll code will try and scrape data off of it! This is obviously less than ideal and will undoubtedly throw errors when we try to run our code! These three elements work in harmony to prevent this.
After importing what we need, the next thing we should do with every Selenium script is to set up our driver! Remember when I asked you to take note of the location of your chromedriver executable? This is when we need it!
    PATH = "C:\Program Files (x86)\chromedriver.exe"
    driver = webdriver.Chrome(PATH)
As for me, I store my chromedriver executable in my C drive, but just replace PATH with the path that you have stored your chromedriver executable in your computer!
Now that the driver is set up, let’s visit the webpage! We use the webdriver’s simple .get() method to visit a webpage!
    url = “https://www.scrapethissite.com/pages/forms/”
    driver.get(url)
    time.sleep(3)
    #We sleep the script here just so we can see the browser pop up!
If you were to run your code now, you will see a chrome browser pop up and visit the specified url! Congratulations, you have created your first automated bot! Isn’t it so cool? It looks just like any human using a computer and searching the web!
Now let’s move on to actually interacting with the webpage itself! As I’ve wrote about before, Selenium also uses CSS selectors when it comes to picking elements off a HTML page!
So the first thing we need to do is search for our favourite team, and for today’s article let’s just say that team is the Boston Bruins! We first have to find the searchbar in the middle of the screen. If you were to Inspect the page (right click, Inspect), you would realise the searchbar element has an ID of “q”. Let’s use that to pick out the searchbar element!
Before that, let’s ensure the searchbar element has loaded. We use the three imports that we talked about earlier in this code to ensure that the searchbar has loaded before we try and pick it out!
    wait = WebDriverWait(driver, 3).until(EC.presence_of_element_located((By.ID, "q")))
    searchbar = driver.find_element_by_id('q')
I know that looks complicated, but it’s actually real simple! The first line actually just ensures that the searchbar has loaded, by searching for an element with the id of “q”! WebDriverWait takes in 2 parameters in this case, the webdriver we are using (int this case the variable driver that we defined before), and the number of seconds it waits for the element to load before crashing (in this case, we specified 3 seconds!). After that, just use expected_conditions (EC) to find the element of the searchbar! It does this using the By object, and in this case since we are using the ID to find our searchbar, we use By.ID! The By object also has many different kinds of ways to locate other elements, like Class Names and CSS selectors!
Now if you were to run this code without the WebDriverWait it would still work, but in some cases with slower webpages, if you try and locate an element without first ensuring it loads, your script will crash! That would make your script pretty inconsistent and useless.
Let’s move on! Now that we located our searchbar, let’s type in our favorite team and search for their statistics! We type in the searchbar simply by using the .send_keys() method!
searchbar.send_keys(“Boston Bruins”)
This will input the string “Boston Bruins” within the searchbar! To search, we just find the search button and click it with the .click() method!
    button = driver.find_element_by_class_name(‘btn-primary’)
    button.click()
    time.sleep(3)
    #Again sleeping to see browser results!
If you run your code now, you will see that your script searched for boston Bruins on the webpage! How cool, now we are actually interacting with the website like a normal user!
Now that we’ve accessed the page we want, the history of statistics of our favourite team - the Boston Bruins, let’s get down to scraping!
Let’s first get the table element, and then a list of each row in the table.
    table = driver.find_element_by_class_name('table')
    rows = table.find_elements_by_class_name('team')
After obtaining the list of table rows, let’s just loop through them and check if for that year, our team had a wining percentage of greater than 50%! If yes, let’s print that out in our console!
    for row in rows:
        win_rate = float(row.find_element_by_class_name("pct").text)
        if win_rate > 0.5:
            year = row.find_element_by_class_name("year").text
            print("The Boston Bruins had a winning year in " + year + " with a winrate of " + str(win_rate))
Now run your code! If you’ve followed my code diligently, watch as the browser searches for our team, clicks the enter button and scrape all our beautiful data into our console! Isn’t that satisfying?
Conclusion
Now you can add Selenium into your bag of tricks! No more fumbling over Dynamic Websites any longer! With the use of Selenium, it opens up so many new websites that you can now scrape. Go wild! Explore pages that load dynamically and use selenium to interact with them and scrape data off them!
Selenium isn’t only limited to webscraping! Try using it to play browser games like cookie clickers, or even use it to automate some daily processes you do everyday! For example, I’ve heard of people using selenium to automate their grocery shopping! When they need to buy groceries, they run a Selenium script and it helps them to go the the supermarket’s website, click on all the items they regularly buy and checkout! The uses of selenium are truly endless.
I hope today’s article was a good introduction to this amazing package. If you enjoyed it and learnt something, please consider subscribing to our Email Newsletter and follow us on social media! Stay cool, cucumbers!